


Dreadlocks 3D: A Complete Guide to Creating Realistic Digital Locs
-
- August 20, 2025
Introduction
Welcome! If you’ve landed here, chances are you’re curious about “dreadlocks 3d” and how this unique style translates into the world of digital design. Whether you’re a new parent exploring creative outlets during quiet moments, an artist looking to bring more diversity into your 3D characters, or simply someone fascinated by the beauty of dreadlocks, this guide is here to walk you through it.
In simple terms, “dreadlocks 3d” refers to the process of creating realistic dreadlock hairstyles using 3D modeling and design software. Just as dreadlocks in real life carry cultural depth and individuality, their digital counterparts bring character, personality, and authenticity to virtual creations. From video games and animations to digital portraits and even 3D printing, mastering dreadlock modeling opens up exciting possibilities for artists and hobbyists alike.
The purpose of this article is to give you a step-by-step, beginner-friendly guide that blends expert techniques with easy-to-follow advice. By the end, you’ll not only understand the basics of modeling dreadlocks in 3D but also gain practical insights on tools, tips, and creative approaches that can help you bring your digital hairstyles to life with confidence.
1. Understanding 3D Dreadlocks: Basics and Context
1.1 What Are Dreadlocks? A Quick Real-World Primer
Before diving into the digital side, it helps to first understand dreadlocks in real life. Dreadlocks are a hairstyle where strands of hair are intentionally matted or locked together, creating rope-like textures. They are not just a style choice; they hold deep cultural and spiritual meaning across different communities around the world. For some, dreadlocks symbolize strength, heritage, or religious beliefs, while for others they are a form of self-expression and identity.
There are many ways dreadlocks can form. Some people create them by twisting sections of hair, while others use backcombing or a crochet hook to help the strands lock together. In other cases, hair naturally locks over time without much manipulation, depending on its texture. Each method produces a slightly different look, which adds to the variety and individuality of dreadlocks.
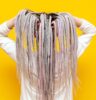
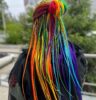
It’s also worth noting that not all dreadlocks are natural. There are synthetic or styled versions—often called dreadlock extensions or cyberlox—that allow people to enjoy the look without fully committing their natural hair. These can come in bright colors, creative textures, or even plastic tubing styles often seen in alternative fashion and cosplay communities. Acknowledging this range is important, since 3D modeling can draw inspiration not only from traditional locks but also from modern, experimental variations.
1.2 Why 3D Dreadlocks Matter in Today’s Digital World
Now that we know what dreadlocks are, let’s look at why they’ve become so significant in the digital design space. In today’s world, 3D dreadlocks are showing up in more places than ever before—video games, animated films, virtual reality experiences, digital art, and even 3D-printed figurines.
From a creative perspective, dreadlocks present a unique challenge and opportunity. They require careful attention to texture, volume, and flow in order to look natural on a 3D character. At the same time, they bring a level of authenticity and diversity to digital creations that audiences increasingly expect. For example, game designers might use dreadlocks to represent cultural identity in a character, while digital artists might choose them to highlight individuality in a portrait.
Ultimately, 3D dreadlocks combine art, technology, and cultural respect. By understanding both the traditional roots and the digital techniques, creators can design hairstyles that are visually impressive while also honoring the style’s history and significance.
2. Gathering Foundations: References, Tools & Workflows
Before opening up any 3D software, it’s important to set a strong foundation. Creating convincing dreadlocks in 3D isn’t just about technical skill; it’s about understanding the visual, cultural, and stylistic references that inform the look. Once you have the right inspiration, choosing the right tools and following a structured workflow becomes much easier.
2.1 Collecting Quality References
One of the most common mistakes new artists make is jumping straight into modeling without gathering enough references. To make 3D dreadlocks look natural, you need to study the hairstyle in its many forms. This means collecting:
- Photos and artwork that show different dreadlock patterns, thicknesses, and lengths.
- Cultural examples, since dreadlocks vary widely depending on tradition and origin. For instance, Caribbean dreadlocks look different from African wicks or European freeform locks.
- Synthetic and styled versions, like neon-colored extensions or cyberlox, which can inspire more experimental 3D designs.
Having a healthy mix of references allows you to add depth and realism. Instead of creating dreadlocks that look too uniform, you’ll be able to capture the natural imperfections and variations that make them believable. As some artists on design communities like Reddit note, building a moodboard of images before modeling saves hours of revision later.
2.2 Toolkits and Software Options
Once your references are ready, the next step is choosing the right tools. There isn’t a single “correct” program for dreadlocks 3D, but different platforms excel in different areas:
- Maya + XGen + Marmoset Toolbag: This is a popular professional pipeline for creating realistic dreadlocks. XGen handles strand grooming, while Marmoset helps with real-time rendering and shader adjustments.
- Yeti in Maya: Favored by many character artists, Yeti offers a node-based grooming graph, which gives fine control over shapes, fibers, curls, and scraggle effects—perfect for layered dreadlock builds.
- Blender: A free, community-driven tool that works well with multiple hair systems. Many artists recommend a four-step layering approach here (base, curl, noise, and coverage) to get natural results.
- ZBrush: Ideal for sculpting base meshes or adding detailed dreadlock shapes before moving into grooming tools.
- FiberShop and similar texture-focused programs: Useful for creating realistic hair cards and surface detail that can be applied in game-ready assets.
The key is to pick a toolkit that matches both your skill level and your final output—whether you’re working on high-resolution film assets or optimizing for real-time gaming engines.
2.3 Layered Modeling Strategy (A Proven Best Practice)
Regardless of the software you choose, one principle shows up again and again in professional workflows: layering. By breaking dreadlocks into structured layers, you can achieve a balance of realism and efficiency.
- Structure: Start with the base form—where the locks sit on the scalp, their overall direction, and thickness.
- Texture: Add detail to show twist patterns, frizz, or natural coarseness.
- Detail: Introduce variation with curls, bends, and slight irregularities so the locks don’t all look the same.
- Coverage: Finally, add stray hairs, flyaways, or secondary locks to cover visible gaps and make the style feel more organic.
Blender artists often use a four-part breakdown—base (clump), curl, noise, and coverage layers—to achieve the same result. This layered strategy ensures that the hairstyle looks natural up close while still holding up in real-time rendering or animation.
3. Step-by-Step Workflow: Building Dreadlocks in 3D
Creating realistic dreadlocks in 3D is all about working in layers and stages. Instead of trying to build everything at once, breaking the process down makes it easier to manage—especially if you’re balancing creative work with family life. Here’s a step-by-step approach used by many professional artists.
3.1 Step 1: Reference and Block Out
The first step is to plan the hairstyle’s overall look. Before touching the software, decide on:
- Silhouette: Will the dreadlocks be long and flowing, or short and chunky?
- Density: How many locks will you create? Too few looks sparse, too many can overwhelm the character.
- Curl type: Smooth cylindrical locks, thick freeform wicks, or spiral curls?
- Parting lines: Decide where the locks emerge—this affects realism.
For parents or busy creators, a checklist approach helps. Collect visuals, make a quick moodboard, and jot style notes. Spending 15–20 minutes here can save hours of trial and error later.
3.2 Step 2: Base Structure & Grooming
Once your plan is set, it’s time to build the foundation.
- In Yeti (Maya): Begin with a single groomed strand. Use fiber growth to generate multiple hairs, convert them into thicker fibers, and apply curl or scraggle nodes. This creates the basic locked structure.
- In Blender: Start with the first layer—a base mesh of dreadlocks. Use braid or curl kinks, clumping modifiers, and slight fluff adjustments to mimic real hair volume.
At this stage, don’t worry about tiny details. Focus on shape and flow.
3.3 Step 3: Adding Texture and Curl Variations
Now it’s time to make the locks look more lifelike.
- Blender: Use curl nodes or kink types to introduce variation. Layering medium-sized locks on top of the base gives depth.
- Yeti: Apply curl and scraggle modifiers, controlled with curve expressions. This allows locks to taper naturally, avoiding the “tube-like” look.
The goal here is variation—no two dreadlocks should look exactly alike.
3.4 Step 4: Noise & Imperfection
Perfect symmetry makes dreadlocks look fake. Adding randomness is what gives them authenticity.
- Blender: Add a noise layer to create uneven edges and stray hairs.
- Yeti: Use FBM (fractal Brownian motion) expressions on curl scales to introduce subtle irregularities.
- ZBrush or FiberShop: Sculpt extra surface detail, like twists or rough textures, for closer shots.
Think of this step as adding realism through imperfection.
3.5 Step 5: Final Coverage & Flyaways
Once the main locks are built, fill in the gaps and edges.
- Blender: Add a fourth layer that places smaller strands over the scalp, hiding any bare spots.
- Yeti: Duplicate your existing network, tweak parameters for thinner flyaway hairs, and merge them back with a node.
These little details—loose strands, scalp coverage, and soft transitions—make the dreadlocks feel natural instead of “stuck on.”
3.6 Step 6: Rendering & Optimization
Finally, it’s time to prepare your dreadlocks for presentation or production.
- Use Marmoset Toolbag (or Blender’s/Maya’s native renderers) for real-time feedback on lighting, textures, and shaders.
- Keep your polygon count efficient. For parents or busy professionals, long render times can be frustrating—optimizing textures and geometry ensures smoother workflow.
- Always test in your target environment (game engine, VR, or animation scene) to confirm the locks look right in context.
4. Expert Tips & Insights
Learning to create dreadlocks in 3D can feel overwhelming at first, but experienced artists emphasize a few principles that make the process smoother and the results more convincing. Below are some best practices, quick fixes, and practical advice to help you avoid common mistakes and save time.
4.1 Expert Best Practices
- Hazel Brown (80.lv): Known for her breakdowns on hair modeling, Hazel stresses the importance of layering textures and using hair cards. For beginners, this approach reduces complexity while still achieving realistic results. Instead of building thousands of strands, start with fewer, well-placed layers, then add cards or small textures to simulate depth.
- FiberShop workflow: Professional texture artists recommend focusing on simplicity and balance. Avoid overly dense textures. Instead, play with negative space and vary the density of fibers across the dreadlocks. This creates a richer, more natural look, especially in real-time renders.
- Creality Cloud insights: Their advanced sculpting tutorials highlight the importance of natural flow. Locks should follow the curve of the head, with slight irregularities. Overly straight or perfectly curved locks can look artificial. Using sculpting tools to add subtle bends and weight makes a big difference.
4.2 Quick Fixes & Common Pitfalls
Even skilled modelers run into challenges when building dreadlocks. Here are a few fixes that work well:
- Over-curling at the root: This often happens when modifiers are too strong. Using curve expressions (in Yeti or similar tools) helps taper curls gradually, giving a smoother transition from scalp to lock.
- Uniform clumping: Dreadlocks that look too identical can break realism. Varying width, length, and tightness of locks creates natural diversity.
- Avoiding perfection: Real dreadlocks are never flawless. Adding slight asymmetry, loose flyaways, or stray strands softens the style and makes it feel authentic.
4.3 Parenting-Friendly Advice
For new parents or anyone balancing creative work with family responsibilities, here are a few ways to stay productive without burning out:
- Work in short, focused sessions: Spend one session just gathering references, another setting up the base mesh, and so on. This makes progress manageable.
- Simplify early drafts: Use fewer subdivisions or layers at first. This lets you visualize the hairstyle without long render times, then refine later.
- Use side-by-side comparisons: Render quick previews at each stage and compare them with your references. This makes spotting mistakes easier and avoids wasted effort.
By applying these insights, you’ll not only improve the realism and quality of your dreadlocks 3D, but you’ll also make the workflow more efficient and less stressful—perfect for both beginners and busy creators.
5. Emerging Trends & Cutting-Edge Tech
As technology evolves, so does the way artists approach dreadlocks in 3D. What once required hours of manual grooming is now being enhanced by artificial intelligence, automation, and inspiration from real-world fashion. These trends are shaping how 3D dreadlocks are created, customized, and integrated into digital projects.
5.1 AI-Driven 3D Hair Generation
Recent advances in AI have opened the door to tools that can generate complex hairstyles—including dreadlocks—with minimal input. A few standout innovations include:
- DiffLocks: This research project uses diffusion models to reconstruct tightly curled hairstyles from a single photo. By training on a synthetic dataset of over 40,000 hairstyles, it can reproduce highly detailed dreadlocks without manual grooming. This is a game-changer for artists who want speed without sacrificing quality.
- TANGLED: Designed to handle both stylized art and realistic hair, TANGLED can generate 3D dreadlocks from line drawings or multi-view images. It’s particularly powerful for braids and intricate dread styles, giving creators more flexibility.
- HAAR: An experimental system that uses text-based prompts to design strand-level hair. With this tool, an artist could type something like “short asymmetrical dreadlocks with loose curls,” and the system generates a base model. It’s not yet perfect, but it shows the future of text-to-3D creativity.
For artists, these tools don’t replace traditional workflows but speed them up. Instead of sculpting every lock from scratch, AI can generate a draft model that you refine with Blender, Maya, or ZBrush.
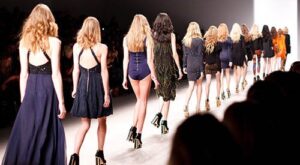
5.2 Fashion & Style Relevance
Beyond technology, real-world fashion trends continue to influence digital dreadlock designs. Hairstyles such as sweeping dread buns, halo twists, or asymmetrical bobs are increasingly popular in fashion and media. These styles bring personality and uniqueness to 3D characters, helping them stand out in games, films, or VR experiences.
For creators, following fashion sources—like hair magazines, style blogs, or even runway looks—can spark new ideas. Translating these styles into 3D not only makes your work more current but also ensures representation of diverse looks in digital art.
Conclusion
Mastering dreadlocks 3d is ultimately about finding the right balance between structure, texture, and realism—while remembering that layering is the key to success. By building in stages, adding imperfections, and drawing from both natural and synthetic references, you can create digital dreadlocks that feel authentic and visually striking.
Whether you’re a busy parent working in short bursts, a hobbyist exploring new creative outlets, or an aspiring 3D artist refining your craft, the path forward is the same: experiment boldly. Blend traditional grooming techniques with new AI-powered tools, allow for natural variation, and trust that small details—like flyaways or subtle asymmetry—will elevate your final work. With patience and intention, your digital dreadlocks can move beyond a hairstyle into a true expression of artistry.
FAQs: Dreadlocks 3D
Q1: What does “dreadlocks 3d” mean?
“Dreadlocks 3d” refers to creating realistic dreadlock hairstyles using 3D modeling software such as Blender, Maya, or ZBrush. It’s commonly used in gaming, animation, digital portraits, and even 3D printing.
Q2: Which software is best for making 3D dreadlocks?
There’s no single “best” program—it depends on your goal. Blender is free and great for beginners, Maya with XGen or Yeti is widely used in professional pipelines, and ZBrush is excellent for sculpting detailed shapes.
Q3: How can I make my 3D dreadlocks look realistic?
The secret is layering. Start with a base structure, add texture and curl variations, introduce noise for imperfections, and finish with flyaways or scalp coverage. Using references and avoiding uniform shapes also makes the hairstyle more believable.
Q4: Can AI tools help with dreadlocks 3D modeling?
Yes. New AI systems like DiffLocks, TANGLED, and HAAR can generate base dreadlock models quickly. While they don’t replace manual artistry, they save time by giving you a strong starting point to refine in traditional software.
Disclaimer:
This content is provided for general informational purposes only. While the information is based on publicly available sources, it should not be considered legal, medical, financial, or professional advice. Readers are advised to consult a qualified expert before making any decisions based on the information shared here.