


French Braid: A Complete Step-by-Step Guide to Classic Braids
-
- November 14, 2026

The short answer to french braid is that it is a three-strand braid worked close to the scalp, where each strand crosses over the middle and a little new hair joins in before every crossing. That adding-in is the whole technique. It is what turns a loose plait into a braid that hugs the head, stays neat all day, and melts into the hair instead of sitting on top of it.
This guide is the dedicated walkthrough our site has been missing. Our Dutch Braid guide covers the reverse version — strands crossing under, for a raised, bold finish — and it says plainly that no french braid post existed yet. This one covers the classic version only: the overhand rhythm, the soft blended finish, and the styles that grow out of it.
Here is the roadmap: what a french braid actually is, how it differs from a dutch braid, preparation, the step-by-step walkthrough, the styles, hair types, french braids on locs and braided hair, what most articles miss, common mistakes, how long it lasts, who it suits, the DIY trade-off, a start checklist, a 7-day action plan, and answers to the questions people ask before their first french braid.
Quick Decision: French Braid in One Glance
- The look. Soft, smooth, blended — the braid disappears into the hair instead of standing out from it.
- The feel. Secure without being severe. A well-done french braid feels held, not pulled.
- The time. A day, sometimes two or three with night protection. It is a daily style, not a weeks-long one.
- The verdict. If you want a bold, raised braid, read our Dutch Braid guide instead. This style is for softness lovers.
If the blended finish is the reason you are here, this guide is yours.
What a French Braid Actually Is 01
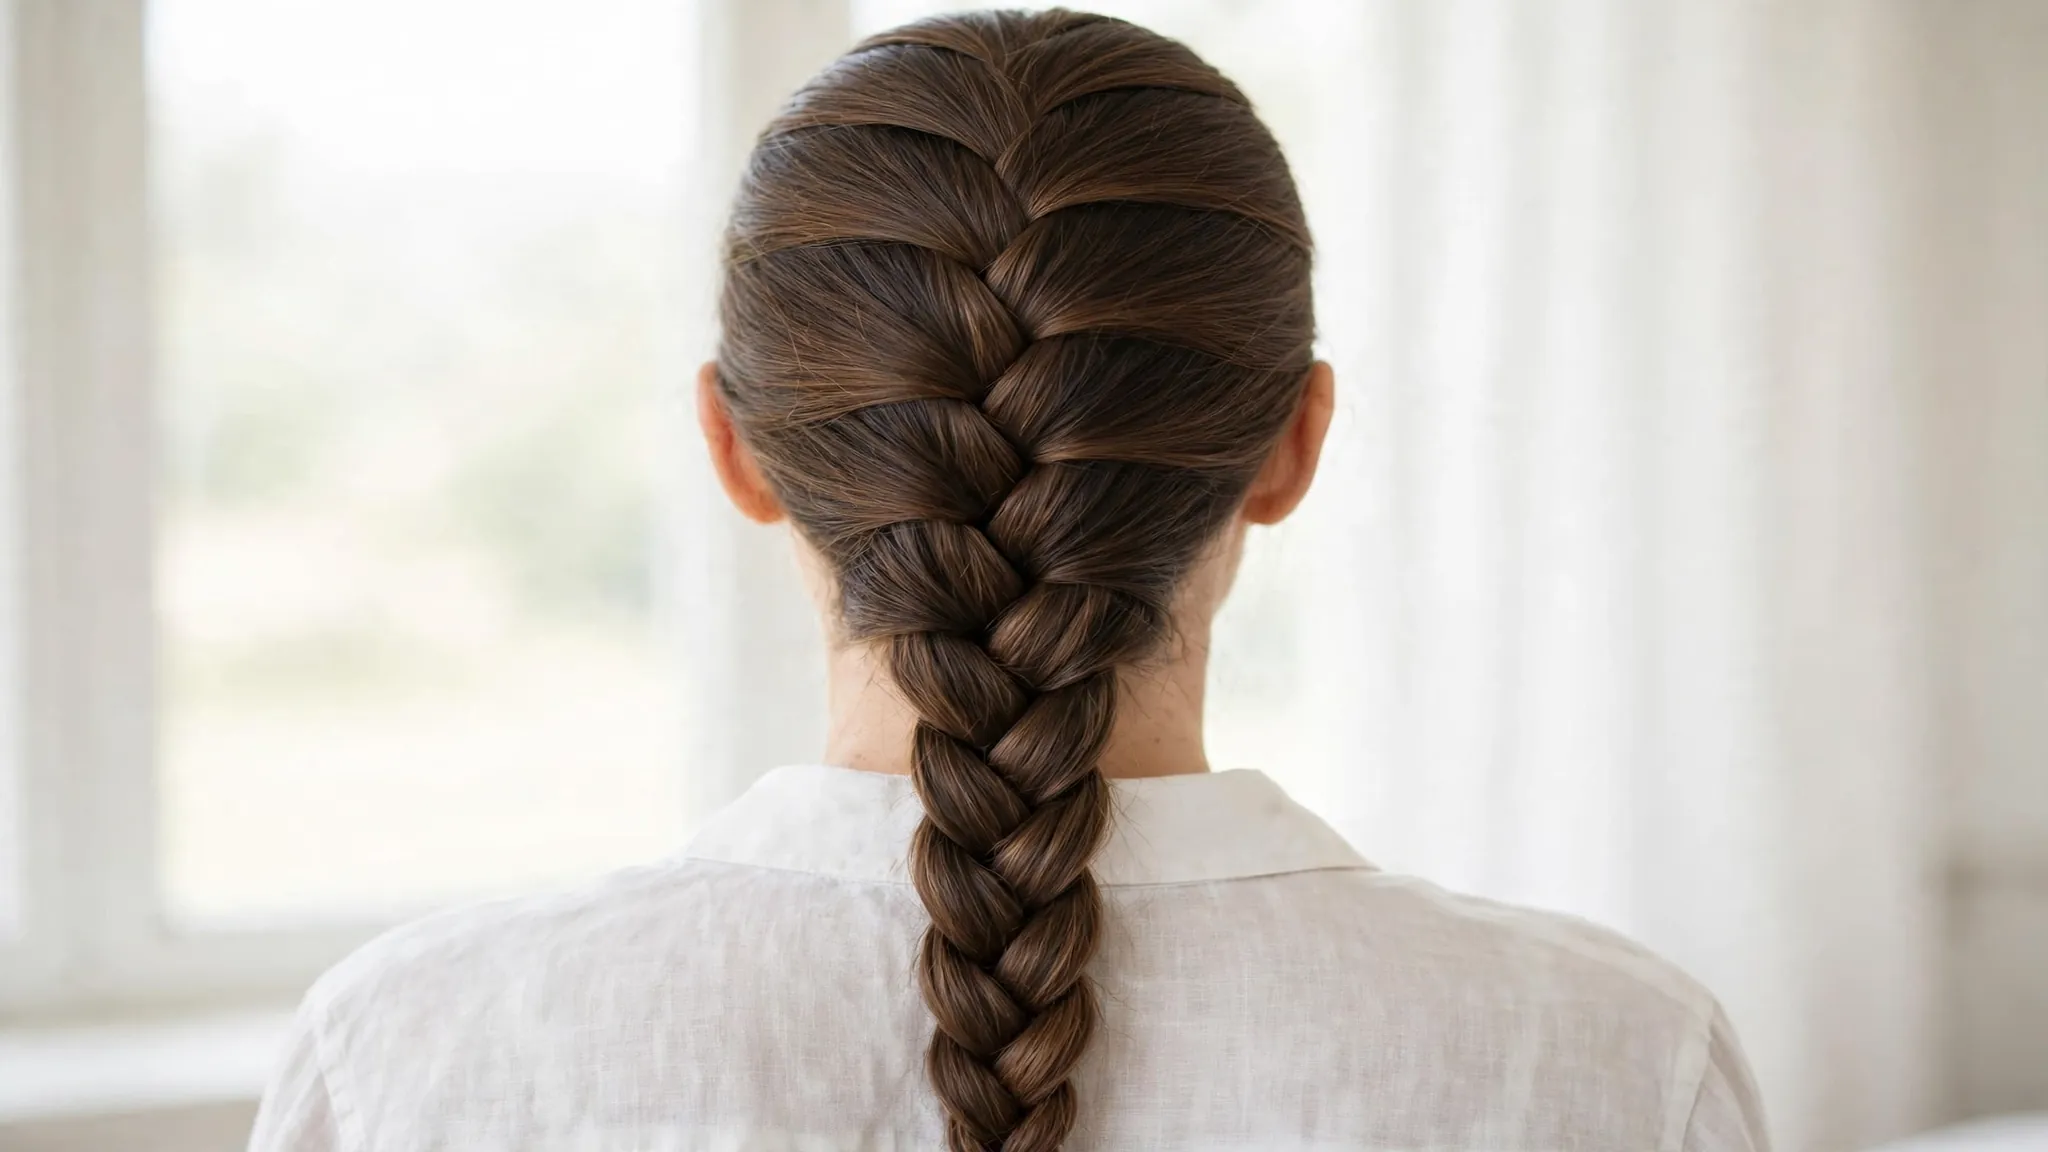
A french braid starts like a regular three-strand braid at the front of the head. The difference begins at the second crossing: before each new crossing, you gather a small section of loose hair from the side and add it to the strand you are about to cross. Cross, add, cross, add — that rhythm carries the braid down the head.
Because every strand crosses over the middle, the braid sits flat against the head and blends into the hair around it. The finish is smooth and classic, which is why the french braid is the default braid for school, work, sport, and weddings alike. It reads as neat rather than dramatic.
The braid needs enough hair to keep feeding in. If the hair runs out of loose sections to add, the braid simply becomes a regular three-strand plait for the tail. That changeover — from french braid to plain plait — is normal, and it happens at the nape on most heads.
A french braid is also a plait, in the older sense of the word. A plait is any three-strand braid, and the french version is a plait that picks up hair as it goes. If your scalp is tender or your edges are fragile, keep the tension gentle at the hairline — the braid should feel secure, never sore.
French Braid vs Dutch Braid 02
One table, then the detail stays in the two guides. French and dutch braids share the same skeleton — three strands, hair added as you go — and differ in exactly one move: the crossing direction. That one move changes the whole look.
Table 1: French vs Dutch at a Glance
| Feature | French braid | Dutch braid |
|---|---|---|
| Crossing | Over the middle | Under the middle |
| Finish | Flat, soft, blended | Raised, bold, 3D |
| Best for | Everyday, work, weddings | Statement looks, photos |
| Harder to learn | Easier first braid | Fights muscle memory at first |
| Learn more in | This guide | Dutch Braid guide |
Choose by the finish you want, not by difficulty. If you can french braid, you can dutch braid — you only have to reverse one habit. Our Dutch Braid guide teaches that reversal in full, with the same step-by-step structure as this guide.
Most people should learn the french braid first. The overhand crossing matches the way your hands already want to braid, so the rhythm arrives faster. Once the french rhythm is automatic, the dutch version is a small change, not a new skill.
Before You Start: What to Prepare 03
Start with clean, dry, fully detangled hair. Knots are the enemy of a french braid: every added section must slide cleanly into the strand, and a knot mid-braid stops the rhythm. Brush through the hair first, then part it where the braid will begin.
Second-day hair braids more easily than freshly washed hair, because it has a little grip. If your hair is very slippery, a light mousse or texture spray on the lengths helps the strands hold each other. Keep the product light — heavy product makes the braid stiff and dull.
Gather three things before the first crossing: a comb for clean partings, two or three small elastics, and a mirror you can check the back in. A phone camera propped behind you works as a second mirror and catches the drift you cannot feel.
Decide the style before you braid. A single braid down the centre, double braids, a side braid, and a crown braid all start the same way — the parting and the first section decide which one you get. Changing your mind halfway down means starting over.
How to French Braid: Step-by-Step 04
A french braid runs in two phases: the plain start, then the adding-in. Knowing where one ends and the other begins keeps the braid even, because the most common beginner error is starting to add hair too early — or too late.
The plain start: three strands, two crossings
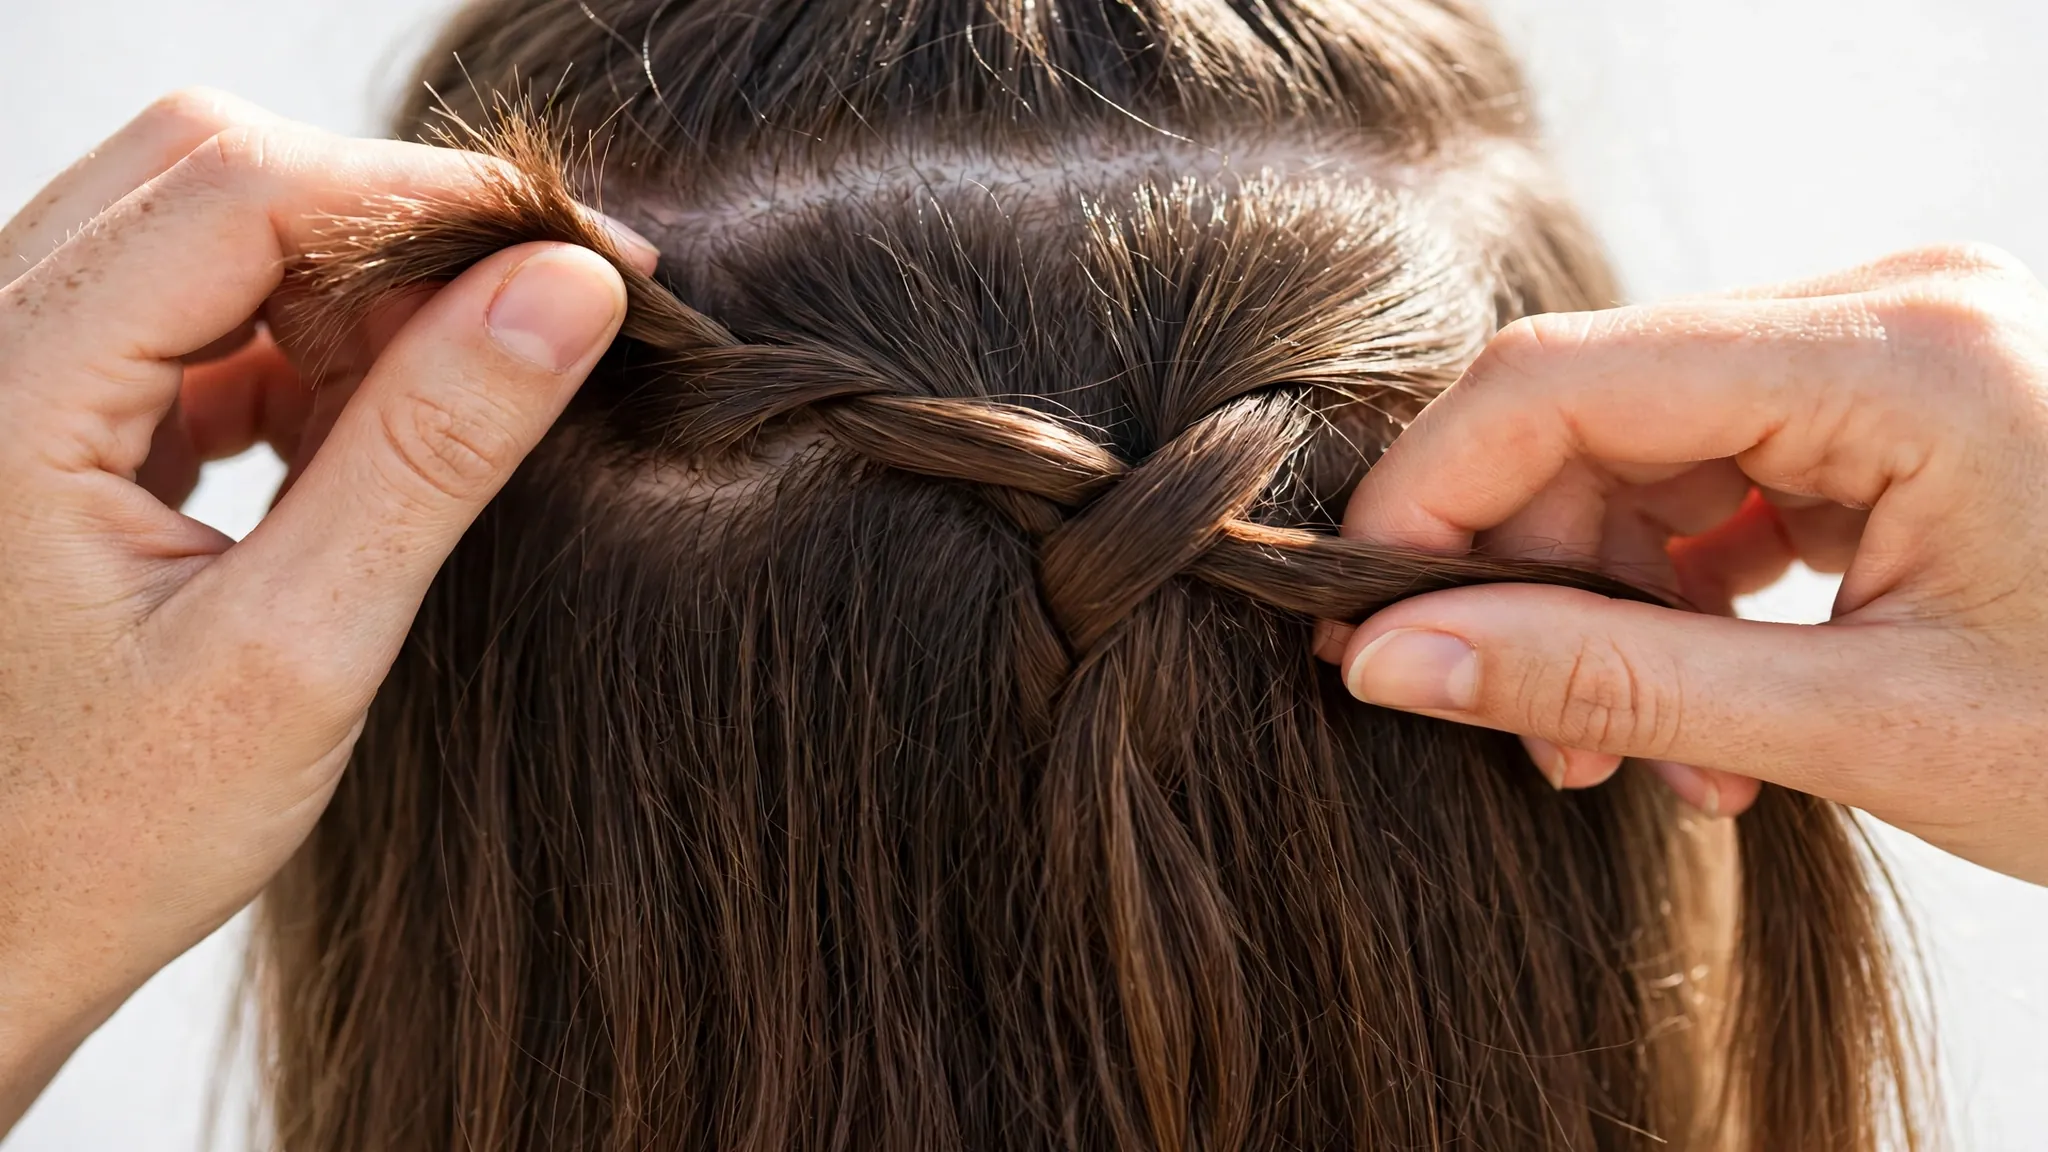
Take a section at the front hairline and split it into three even strands: left, middle, right. Cross the right strand over the middle, then the left strand over the new middle. That is one full round, and it is still a plain braid — no hair has been added yet.
Do one more plain round if the start feels loose. Two plain crossings anchor the braid at the hairline and set its direction. If the first crossings lean, undo them now: the first three crossings decide the whole braid, and a lean at the top never straightens itself out below.
Adding hair as you go: the feed rhythm
Now the french part begins. Before crossing the right strand over, gather a small, even section of loose hair from the right side and add it to the right strand. Cross the combined strand over the middle. Then do the same on the left: gather, add, cross over.
Keep the added sections the width of two fingers, every time, on both sides. Big on one side and small on the other makes a lumpy, leaning braid. Say the rhythm to yourself — “add, cross, add, cross” — until your hands know it without thinking.
Work down the head in this rhythm until you reach the nape and run out of loose hair to add. Then finish with a plain three-strand plait to the ends and secure with an elastic. Gently pull the outer loops wider — pancaking — if you want a softer, fuller look.
French Braid Styles at a Glance 05
One technique, many styles. Every style below uses the same overhand feed rhythm — only the parting, the direction, and the finish change. Learn the single braid first, then the rest are variations, not new techniques.

Table 2: French Braid Styles at a Glance
| Style | Best for | Difficulty |
|---|---|---|
| Classic single | Everyday, work, school | Easiest |
| Double french | Sport, long days out | Medium |
| Side french | Soft, romantic looks | Easy |
| French crown | Weddings, events | Harder |
| French ponytail | Tidy, practical days | Easy |
| French bun | Formal, long wear | Medium |
Classic single and double french braids
The classic single starts at the front hairline and runs straight down the centre to the nape. It is the braid to learn first, because everything else is a change of direction from here. Wear it loose for softness, or pancake it gently for fullness.
The double splits the hair down the centre and braids each side separately. It holds better than a single on active days, because each braid carries half the hair. Keep the centre parting straight — a wobbly parting is the first thing people notice in a double braid.
Side, crown, ponytail, and bun finishes
A side french starts above one ear and sweeps across the head, which suits shorter hair and softer faces. A crown french circles the head and pins at the back — the hardest style here, and the one most worth booking a stylist for if photos matter.
A french ponytail stops adding hair at the crown and gathers the rest into a ponytail. A french bun does the same, then coils the tail into a bun. Both give you the tidy front of a french braid with a faster finish, and both last longer than a braid worn loose.
French Braids for Different Hair Types 06
Thick hair holds a french braid easily and looks full with very little effort — the challenge is arm fatigue, not grip. Work in smaller added sections and take a break halfway if your arms tire; a braid finished in two calm sessions beats one rushed with shaking hands.
Fine hair is the opposite problem: the braid wants to slip. Texture spray, a light mousse, or braiding on second-day hair solves most of it, and smaller added sections grip better than large ones. Curly and coily hair braids beautifully into french styles — the texture gives natural grip — but needs thorough detangling first, because a knot mid-braid stops the whole rhythm.
Short hair can wear a french braid too, usually as a side braid, a crown, or a short double braid. The rule is simple: the braid needs enough length to cross over at least four or five times, or it will not hold. Below that length, a french accent — a short plait at the hairline — is a style in its own right.
French Braids on Locs and Braided Hair 07
Yes, you can french braid locs — and the result is neat, because the flat braid blends into already-textured hair. The technique is the same overhand rhythm, but the “strands” are groups of locs instead of loose hair. Our Plaits Dreads guide covers plaiting locs in full — styles, care, and the step-by-step for braiding dreadlocks — so this guide does not repeat that material.
The key difference to remember: a french braid on loose hair adds hair as it goes; a french braid on locs groups existing locs, and nothing new is added. That makes the loc version faster and lighter, but it also means the braid size is set by your loc size. Small locs give fine, detailed french braids; thick locs give bold, chunky ones.
If you are choosing between loc styles overall, our Types of Locs guide compares the maintenance each type asks for, and our Micro Locs guide explains the smallest locs in detail. For the bigger picture of braids versus locs, read our Dreads vs Braids comparison.
What Most Articles Miss 08
The first miss: the first three crossings decide the whole braid. If the first crossings are uneven — one strand thicker, one pulled tighter — the braid will lean for its entire length, and no amount of careful work later fully straightens it. Spend an extra minute on the first three crossings. Undo them twice if you must; the rest of the braid will thank you.
The second miss: the back of the head. You braid by feel where you cannot see, and the braid drifts toward your dominant hand without you noticing. Check in a mirror every few crossings, or prop your phone camera behind you. A braid that drifts is the single most common reason a first french braid looks “wrong” in photos.
The third miss: pancaking is a technique, not an accident. Gently pulling the outer edges of a finished braid wider — called pancaking — is how braiders get that full, soft, voluminous look. Do it a little at a time, starting from the bottom and working up, and stop before the braid loosens. Most guides never mention it, so most beginners wear their braids narrower than they could.
Myth check — what most articles get wrong:
Myth one: french braids are only for long hair. You need enough length for four or five crossings, not waist-length hair. Side braids, crown braids, and short double braids all work on medium and even shorter hair. The braid gets shorter and the style gets smaller — the technique stays exactly the same.
Myth two: a french braid has to be tight to hold. A braid holds because the crossings are even and the added sections are small, not because it is pulled hard. A tight braid hurts, stresses the edges, and loosens faster at the hairline. Firm, even tension through the middle and gentler tension at the hairline is the combination that lasts.
Myth three: a french braid is just a regular three-strand braid. A regular plait never picks up new hair — it only braids the hair you started with. The adding-in is what makes a french braid hug the head, and it is the skill to practise. If your braid keeps sliding off the head, you are plaiting, not french braiding — start adding hair earlier.
Common French Braid Mistakes (and Fixes) 09
Mistake one: adding hair too late. Waiting until halfway down to start feeding hair in leaves the top of the braid loose and floppy. The fix is to start adding on the third crossing at the latest — the braid should hug the head from the front hairline onward.
Mistake two: uneven added sections. Adding a big chunk on one side and a small chunk on the other makes a lumpy, leaning braid. The fix is to keep added sections the width of two fingers, every time, on both sides. Slow, even additions beat fast, uneven ones.
Mistake three: braiding too tight at the hairline. A french braid pulled hard at the front causes headaches and, over time, stresses the edges. The fix is firm tension through the middle of the braid and gentler tension at the hairline and nape — the two places where the scalp feels it most.
Mistake four: skipping the pancake. A braid left exactly as braided looks thinner than it is. The fix is a gentle pancake after securing the ends: pull the outer loops wider, a fraction at a time, from the bottom up, until the braid looks full without feeling loose.
How Long French Braids Last — and Keeping Them Fresh 10
A french braid on loose hair is a daily style, not a weeks-long protective style. Most people wear one for a day, and a well-done one can look good for two or three days with night protection. Sleeping in a french braid is fine — a satin bonnet or scarf keeps it neat — but the braid will loosen a little each night, and the blended finish softens first.
The wear pattern is simple: day one is the sharpest, day two is softer and more relaxed, and day three is usually a take-it-down day. If you need longer wear, a french braid into a bun holds better than a braid worn loose, because the bun anchors the tail. For longer protective styles built on braids, our Box Braids guide and our Stitch Braids guide cover styles that last weeks rather than days.
Take the braid down gently, strand by strand, instead of pulling it apart in one motion. A french braid undone carefully leaves soft waves in the hair — a free second hairstyle that many people plan for. Our washing dreadlocks at home guide covers the gentle-wash technique that applies here too, even though the braid itself is on loose hair.
Frizz is the french braid’s natural enemy, because the flat braid shows every flyaway against the smooth surface. The fix starts before braiding: smooth the hair fully, use a light leave-in or a small amount of styling cream on the lengths, and keep a clean edge with a soft brush. A tiny amount of gel or edge control on the hairline, smoothed with a toothbrush, finishes the look without stiffness.
During the day, resist the urge to keep touching the braid. Every touch loosens a crossing and invites frizz. If flyaways appear, smooth them with a light mist of water and the palm of your hand, not with more product — layers of product on top of product are what make a braid look dull by evening.
At night, a satin bonnet or scarf is the single best investment for braid care. Cotton pillowcases pull moisture from the hair and rough up the braid’s surface; satin lets the braid slide. For the full routine behind braid care, our dreadlock care hub carries the same principles — clean scalp, light moisture, gentle handling — applied to locs.
Who French Braids Suit 11
French braids suit anyone who wants a braid that reads as neat, not loud. They flatter round and oval faces especially well, because the flat braid keeps the silhouette smooth and the parting gives the face structure. They suit medium to long hair best, where the braid has room to develop, and they work for men and women alike — the double french is one of the most popular men’s braided styles.
Skip the tightest version — for now — if your edges are fragile or your scalp is irritated. A looser, pancaked french braid gives the same look with far less pull, and a side french braid stresses the hairline less than a centre-parted double. The style should feel secure, never sore, and a braid that hurts is a braid done too tight, not a braid done right.
If your hair is very short, start with a french accent braid at the hairline rather than a full braid. It teaches the overhand feed rhythm in five minutes, looks intentional, and grows into the full style as your hair lengthens. For men’s braided options in general, our Cornrow Braids for Men guide shows the wider family of styles.
French Braid vs a Regular Three-Strand Plait 12
A regular plait braids only the hair you start with. It hangs free from the head, and it can be tied anywhere. A french braid keeps picking up hair as it goes, so it stays attached to the head all the way down. That attachment is the difference between a braid that decorates the hair and a braid that holds it.
The plait is faster and easier, and it suits tails, ends, and accents. The french braid takes longer and asks for both hands and a mirror, but it keeps the hair out of the face for a full day. Choose the plait for speed, the french braid for hold.
Many beginners accidentally make a plait when they meant to make a french braid: they cross the strands neatly but forget to add hair. If your braid hangs loose from the start instead of hugging the head, that is what happened. Go back to the third crossing and start feeding hair in — the braid will change character at once.
DIY or Salon: The Honest Trade-Off 13
A salon french braid costs money and takes an appointment; a DIY french braid costs nothing and happens in your bathroom. The real trade is not money versus savings. It is evenness versus convenience — a braider who can see the back of your head will always braid it straighter than you can by feel.
The back of the head is where DIY braids most often fail. The braid drifts, the sections go uneven, and the nape goes lumpy — all in the place you cannot see. The honest middle path is learning the single and double braids on yourself, and booking a salon visit for the crown braid and for any event where photos matter.
Whatever you choose, judge the braid by photos from every angle, not by the front in the mirror. A braid that looks perfect from the front and drifts at the back is a braid only you have not seen yet — everyone behind you has.
- Crossing direction confirmed — every strand goes over the middle, never under.
- First three crossings even — strands matched in size, tension firm but comfortable.
- Parting clean and straight — checked in a mirror before the first crossing.
- Added sections small and even — two fingers wide, same on both sides.
- Night protection ready — satin bonnet or scarf before the braid goes to bed.
Your 7-Day French Braid Practice Plan 14
Learning a french braid is a week of short practice, not a single long session. Run these steps in order and the overhand feed rhythm becomes automatic.
- Day 1: Learn the rhythm on a rope. Practise the overhand crossing on three strands of yarn or ribbon first. Say “over” on every crossing until your hands stop hesitating.
- Day 2: Braid someone else. A friend, a child, anyone patient. Seeing the braid from the front teaches your hands the pattern faster than braiding your own head blind.
- Day 3: Your first single braid. Braid your own hair slowly, checking the back in a mirror every few crossings. Undo the first three crossings twice if they lean.
- Day 4: The double braid. Part down the centre and braid both sides. Compare the two sides and fix the weaker one.
- Day 5: Practise the pancake. Finish a braid, then gently pull the outer loops wider from the bottom up until it looks full without feeling loose.
- Day 6: Try a style. Pick one from the styles table — side braid, ponytail, or bun — and wear it for a full day.
- Day 7: Photograph and judge. Take photos from the front, sides, and back. Fix the one thing that bothers you most, and you have your braid.
After day 7, you are maintaining a skill, not learning one. The checklist in the previous section keeps every braid honest, and our Plaits Dreads guide carries the braided-loc knowledge from here.
French Braid: Questions, Answered 15
What is a french braid?
A french braid — also called a french plait — is a three-strand braid worked close to the scalp, where each strand crosses over the middle strand and a small section of loose hair joins in before every crossing. The adding-in makes the braid hug the head, so it sits flat and blends into the hair.
What is the difference between a french braid and a dutch braid?
Only the crossing direction. A french braid crosses strands over the middle, so the braid sits flat and blends into the hair. A dutch braid crosses strands under the middle, so the braid sits raised and stands out. Same three strands, same rhythm — opposite direction, different finish.
How do you do a french braid step by step?
Split a front section into three strands, cross the right strand over the middle, then the left strand over the new middle. Before each next crossing, add a small, even section of loose hair to the side strand, then cross over again. Repeat down the head, finish with a regular overhand braid to the ends, and secure with an elastic.
Are french braids hard for beginners?
They are the easiest scalp braid to learn, because the overhand crossing matches the way your hands already want to braid. Most people learn the rhythm in one or two practice sessions: braid someone else first, say “add, cross” out loud on every round, and check the back in a mirror. After that, the braid becomes automatic.
Can you french braid short hair?
Yes, as long as the hair is long enough for four or five crossings. Side braids, crown braids, and short double braids all work on medium and shorter hair. The braid will be smaller and shorter, but the technique and the blended look stay the same.
How long do french braids last?
On loose hair, a french braid is a daily style: sharpest on day one, softer on day two, and usually ready to take down by day three. Sleeping in a satin bonnet or scarf extends the wear. A french braid into a bun holds longer than a braid worn loose, because the bun anchors the tail.
Do french braids work on locs?
Yes. A french braid on locs groups existing locs with the same overhand rhythm, and the flat braid looks neat on textured hair. Our Plaits Dreads guide covers plaiting locs in full — styles, care, and the step-by-step for braiding dreadlocks.
Why does my french braid keep sliding off my head?
Because you are plaiting without adding hair early enough. If the braid does not hug the head from the front hairline, the top stays loose and the whole braid slides. Restart and begin adding hair on the third crossing at the latest, with small, even sections on both sides, and the braid will sit flat.
Bottom Line 16
A french braid is three jobs: a clean part, crossings that always go over, and small, even additions of hair. Do those three and the braid blends itself into place. Add hair too late, and the braid slides — the feed rhythm is the whole style.
Use this guide for the classic technique, our Dutch Braid guide for the raised reverse version, and our dreadlock care hub for the routine behind it. Dreadlocks and braids both reward patience, and the french braid rewards it with a finish no loose plait can give. Practise the overhand feed this week — the braid you want next month starts with the rhythm you learn today.
This article is for general informational purposes only. Individual results, hair types, scalp conditions, and situations may vary. For personal hair or scalp concerns, consult a qualified loctician or dermatologist.
