




Starting Microlocs: A Complete Step-by-Step Installation Guide
-
- November 4, 2026

The short answer to starting microlocs is that the install is a project, not an appointment. The chair time takes hours, but the decisions you make before it — the grid, the method, the retightening plan — shape the next two years of your hair. Get those right and the locs mostly take care of themselves. Get them wrong and no product or routine fully fixes it.
This guide is the practical walkthrough our Micro Locs guide deliberately skips. That guide helps you decide whether microlocs fit your life. This one assumes you have decided, and walks you through the install itself: what to prepare, how the grid gets planned, how each start method actually works in the chair, what install day feels like, when the first retightening comes, and how the first 90 days run.
Here is the roadmap: the install framework first, then preparation, grid planning, the method comparison table, the install day walkthrough, what most articles miss, the first retightening, a first-year schedule table, the 90-day aftercare rhythm, the DIY trade-off, a myth check, a start checklist, a 14-day action plan, and answers to the questions people ask before booking.
Quick Decision: Your Install in One Glance
- Map first. Approve your parting grid on photos — including the back — before any method work starts.
- Method second. Twists install fastest, braids hold firmest early, interlocking holds longest between sessions. The table below decides for you.
- Rhythm third. Book the first retightening before you leave the install appointment.
- Speak up. Bumps along parts, itching that is not dryness, or a dull headache are early tension signals, not badges of honor.
If your map is approved, your method fits your hair, and your next appointment is booked, the install did its job.
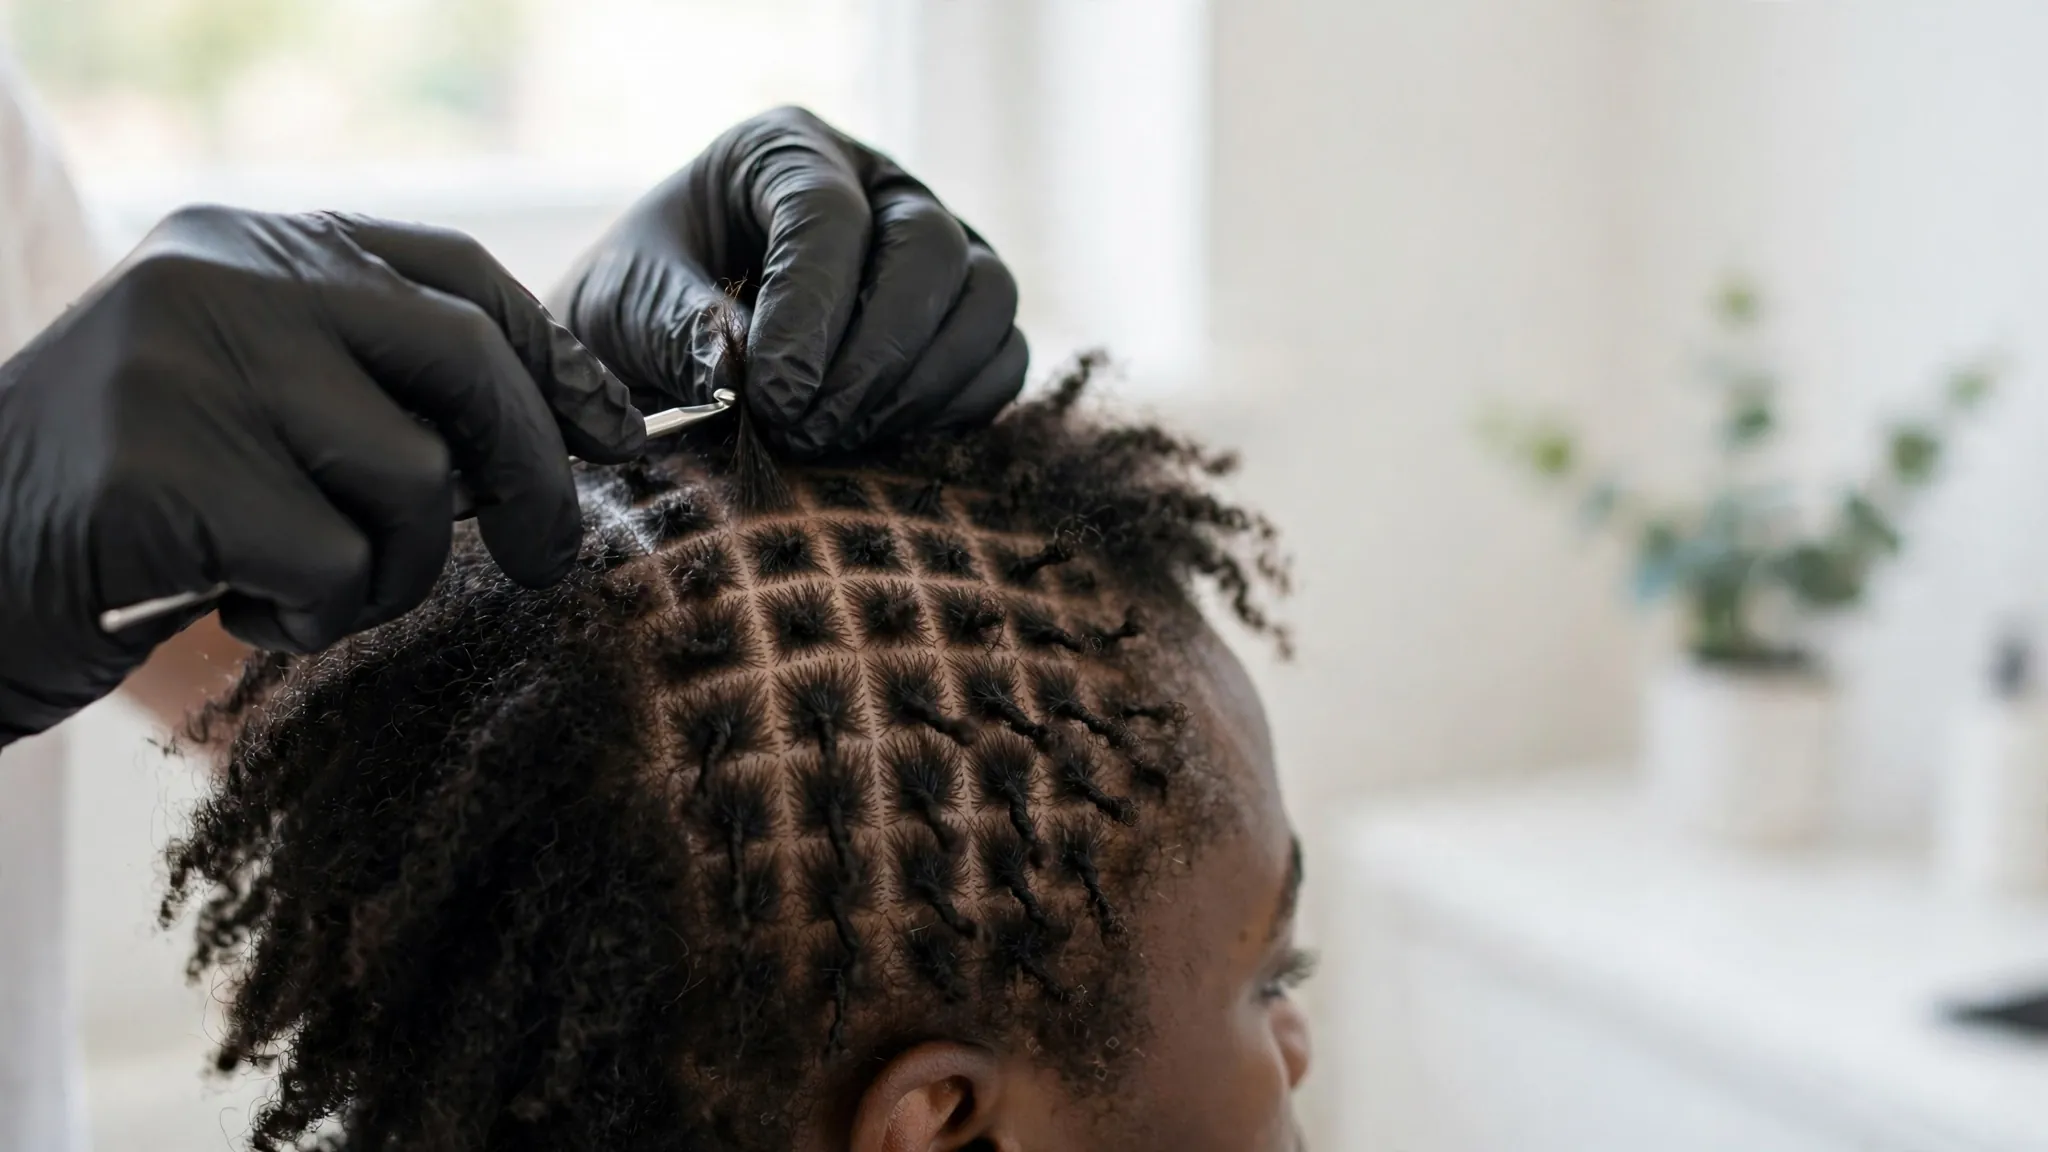
Map, Method, Maintenance: The Install Framework 01
In the Micro Locs guide you made three decisions: size, grid, and rhythm. The install turns each decision into a job. Size becomes the map — the grid drawn on your scalp. Grid becomes the method — how each section gets started. Rhythm becomes maintenance — the retightening calendar you leave with. Remember the three jobs in that order and install day stops feeling mysterious.
Map first, because everything physical follows the parting. A clean, even grid makes every method easier and every retightening neater. Method second, because the method must suit your texture and your tolerance for unraveling. Maintenance third, because a beautiful install with no retightening plan is a countdown to merged roots.
One sentence to carry into the appointment: my map is approved, my method fits my hair, my next appointment is booked. If all three are true when you leave the chair, the install did its job. Everything below is that sentence, worked out in detail.
Before You Book: What to Prepare 02
Start with hair health, not a date. Hair that is breaking, severely dry, or fragile from chemical damage will not hold hundreds of tiny sections well. Spend two to four weeks before the appointment on gentle handling: no tight styles, light moisture, and a clarifying wash a day or two before install so the hair is clean and product-free.
Bring three things to the consultation: photos of installs you like and one you do not like, an honest list of how you actually wear your hair day to day, and your real calendar. The photos show taste, the routine shows which grid suits your life, and the calendar shows whether you can keep the retightening rhythm the method needs.
Ask the loctician the questions that matter: how many microloc installs have you maintained for over a year, what method do you recommend for my texture and why, what does your first retightening include, and what do you do when a client reports tension pain. The answers tell you more than any portfolio photo. For the broader starting journey, our dreadlocks journey guide covers the background this guide builds on.
If a loctician rushes past size, grid, and maintenance talk, treat that rush as information. A good installer interviews you as much as you interview them, because they will be the one maintaining what they start.
Planning Your Grid: Parting That Lasts Years 03
The grid is the map of parted sections across your scalp, and it is the most permanent decision of the whole install. Twists can be redone and methods can be adjusted, but the parting lines stay with you, shaping how locs fall, how they can be styled, and how neat every retightening looks years from now.
In practice, grid planning means three choices: the parting shape, the section size consistency, and the edges. Brick-lay or staggered rows hide parting lines better than straight rows for most people. Sections should be even across each zone — crown, sides, and nape — because uneven sections mature into uneven locs. And the hairline needs smaller, gentler sections, since edges bear the most styling stress over time.
Here is the step most people skip: the photo test. Before any method work begins, ask the loctician to finish the full grid, then photograph it from the front, both sides, the back, and the top. You cannot see the back of your own head in the chair, but you will live with it for years. Approve the map on photos, not on trust.
If you are still weighing microlocs against the trademarked alternative, our Microlocs vs Sisterlocks comparison lays out how the two systems differ, including the grid rules each one follows.
Start Methods Compared 04
Four methods start most microlocs. None is universally best; each trades install time, early hold, and retightening rhythm differently. Read the table, then match it to your texture and your patience.
Table 1: Start Methods Compared
| Method | How it starts | Early hold | Retightening rhythm | Best for |
|---|---|---|---|---|
| Two-strand twists | Hair divided into two strands and twisted | Soft; can loosen in early washes | Every 4 to 8 weeks (ranges vary) | Faster installs, softer start |
| Braids (braided microlocs) | Hair braided in three strands | Firmer from day one | Every 4 to 8 weeks; braids mat into locs over time | People worried about unraveling |
| Interlocking | Tool pulls the loc end through its own root | Firmest hold, minimal unraveling | Longer gaps possible; needs care with tension | Straighter textures, low-maintenance preference |
| Comb coils | Small sections coiled with a comb | Neat but delicate early | Frequent early attention | Coily textures, shorter starts |
Read the table against your life, not just your hair. If you wash often or sleep restlessly, the firmer methods earn their keep. If you want the gentlest start and do not mind early fuzz, twists are kind. The method your loctician does best on your texture usually beats the method you liked in a video.
Extensions can be added with some methods for instant length, which changes the math: more weight, more careful retightening, and a different feel while sleeping. Decide this before the grid is drawn, not during the install, because added hair changes section planning from the first row.
Install Day Walkthrough 05
A microloc install is a long day. Knowing the flow keeps you comfortable and helps you judge the work as it happens. It runs in two big sessions: the grid, then the method.
The Parting Session
The loctician sections your whole head first, working zone by zone. This is slow, precise work — expect an hour or more for hundreds of sections. Watch for evenness: sections in the same zone should match, and the hairline should look deliberate, not rushed. This is when you run the photo test from the previous section.
Speak during parting, not after. A crooked row fixed now costs minutes. The same row fixed after the method work costs hours. Good locticians expect and welcome corrections at this stage, because they know what a bad grid costs later.
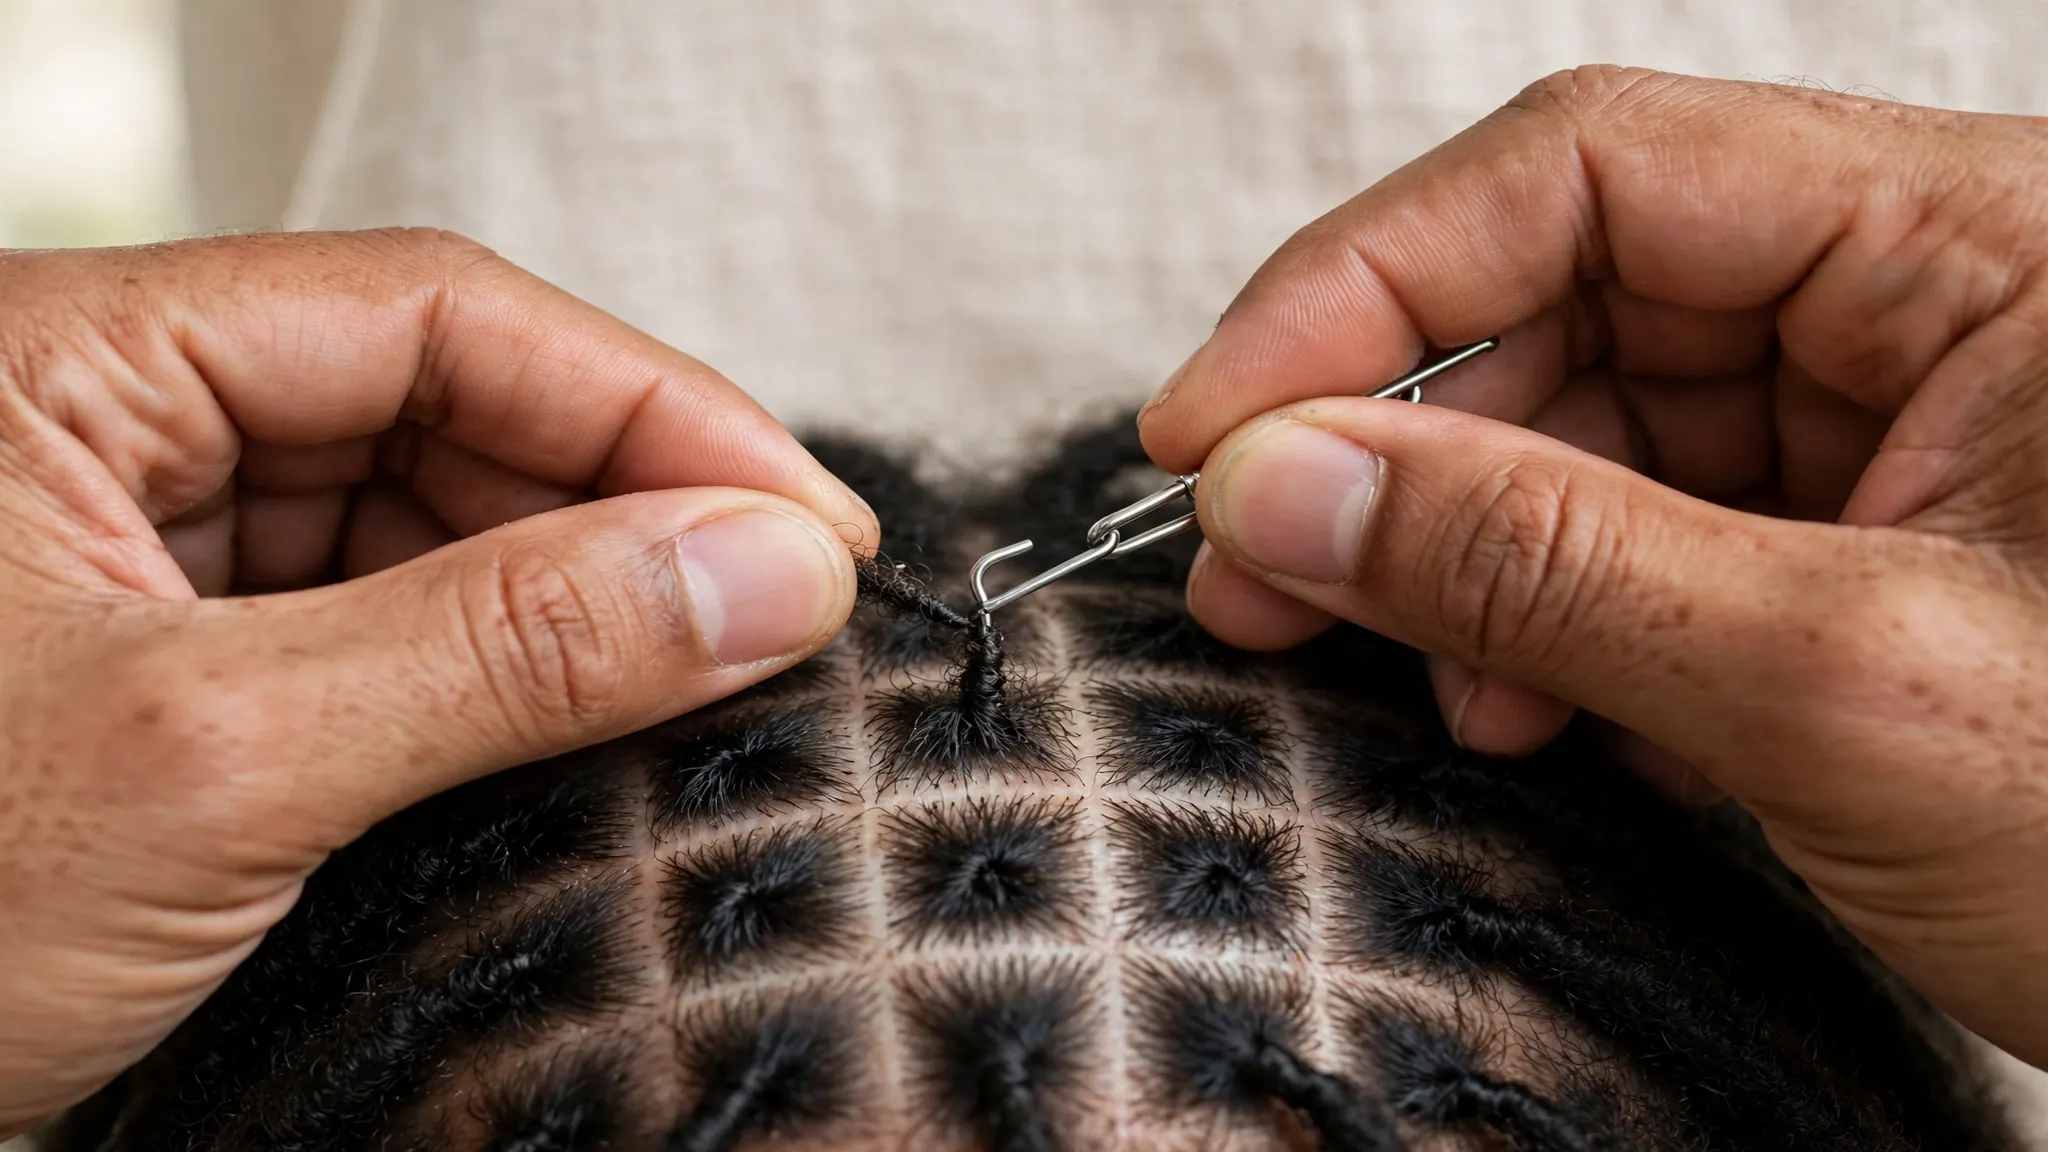
The Method Session
With the grid approved, the loctician works through it section by section with your chosen method. Twists move fastest, braids take longer, and interlocking is the slowest but leaves the firmest hold. Expect several more hours with breaks. Bring water, a snack, and something to listen to.
Tension-check continuously, not at the end. Each section should feel secure, never painful. If your scalp starts aching, say so immediately. Pain is not part of a good install, and a section redone now is a hairline saved later. Many people stay quiet in the chair because they do not want to seem difficult. Speaking up early is maintenance, not rudeness.
What Most Articles Miss 06
The first miss: neatness can hide tension. A fresh install looks best when it is snug, and snug can quietly cross into too tight. The early warning signs are not pain — pain is the late signal. Watch for small bumps along the parts, itching that is not dryness, and a dull headache after the appointment. All three mean sections need loosening, even if the install looks perfect in photos.
The second miss: the back of your head. You approve the grid looking in a mirror, which shows you the front. The nape and crown are where uneven parting hides and where you sleep, which is where unevenness matters most. The photo test exists for exactly this reason, and almost nobody does it.
The third miss: the install is not the hard part. The hard part is the calendar — keeping the first retightening appointment when the newness wears off and life gets busy. Most early merges and mats trace back to a delayed first retightening, not a bad install. Book it before you leave the chair, while the motivation is fresh.
Your First Retightening: What Actually Happens 07
The first retightening usually lands around 4 to 8 weeks after install, though published ranges vary with growth rate, texture, and method. Your loctician sets the date for your head, not for a chart. By then there is visible new growth at the roots, and some locs may have started leaning toward their neighbors.
In the chair, the loctician works through the grid again, tightening the new growth and separating any roots that have begun to marry. It takes hours with hundreds of locs — shorter than the install, but not quick. This is also when the loctician sees how your hair responded to the method and may adjust the long-term plan.
Judge the session the same way you judged the install: evenness, comfort, and no pain. Ask what changed since install day and what to watch before the next visit. If you want the full picture of how locs mature from here, our stages of locs guide maps the road ahead. A retightening that teaches you something is worth more than one that just looks neat.
Your First-Year Retightening Schedule 08
The schedule below is a typical shape, not a prescription. Your growth rate, texture, and method move the dates, and your loctician’s plan overrides any table. Use it to understand the rhythm you are signing up for before you sign up.
Table 2: First-Year Retightening Schedule
| When | What happens | Your job |
|---|---|---|
| Weeks 1–2 | Set holds, minor loosening in a few spots | Protect at night, hands off, photograph the grid |
| Weeks 3–6 | New growth appears, some roots start merging | Separate roots gently, keep washing gentle |
| Around week 6–8 | First retightening appointment | Keep the appointment, report any tension early |
| Months 3–6 | Rhythm settles, locs begin firming up | Keep the calendar, watch for pattern changes |
| Months 6–12 | Young locs, routine maintenance | Maintain the rhythm, enjoy the styling freedom |
The pattern to notice: your job is heaviest between install and the first retightening, then gets lighter as the rhythm settles. Most people who struggle do so in that first gap, which is why the early sections of this guide focus there and not on year two.
The First 90 Days: Aftercare Rhythm 09
Aftercare for fresh microlocs is simpler than most guides make it sound. Protect, separate, wash gently, and keep appointments. Everything else is detail built on top of those four.
Weeks 1–4: Settle and Protect
Sleep in a satin bonnet or scarf from night one. Cotton friction is the quiet enemy of fresh parting, and hundreds of tiny sections have hundreds of tiny chances to blur. Keep hands off during the day; constant touching loosens young sections faster than anything else.
Run a finger along your parts every few days and gently separate any locs trying to merge at the roots. Two minutes now prevents painful un-matting later. Small sections combine faster than large ones, so this matters more for microlocs than for traditional locs. If your loctician advised waiting before the first wash, follow their timing, not a generic rule.

Months 2–3: The First Retightening Window
This is when the install meets reality. New growth needs tightening, early unraveling shows where the method struggled, and your scalp tells you whether the tension was right. Keep the appointment even if everything looks fine, because “looks fine” is exactly when small merges hide between the rows.
Washing settles into a gentle rhythm now. Our washing dreadlocks at home guide covers the technique, and for product choices that will not coat tiny new locs, our products guide sorts every category into help or harm. Once the install phase ends, our dreadlock care hub carries the full routine from here.
DIY or Loctician: The Honest Trade-Off 10
A loctician install costs money and takes a full day in someone else’s chair. A DIY install costs little and happens on your schedule. The real trade is not money versus savings. It is consistency versus convenience, and consistency wins installs.
The parting is where DIY installs most often fail. Parting hundreds of even sections on the back of your own head, by feel, in mirrors, is a different skill from twisting the front rows. Uneven parting does not wash out; it becomes the permanent map. Twisting skill matters less than parting skill, and most people overestimate the second one.
The honest middle path is getting professional help with the grid and the first rows, then maintaining yourself if you want to learn. That split buys you a permanent foundation and a learning curve you can actually climb. Whatever you choose, judge the work by the grid photos, not by how the front looks in the mirror.
Myth Check: What People Get Wrong About Starting Small Locs 11
Myth one: smaller is always healthier. Smaller means more locs, more retightening points, and more places where tension can build. A well-kept medium set beats a neglected tiny set every time. Size is a styling choice with a maintenance price, not a health ranking.
Myth two: interlocking always damages hair. Damage comes from too much tension and too-frequent sessions, not from the method itself. Done with sensible tension on a sensible schedule, interlocking is simply a firm hold. Done too tightly, any method damages, including the gentle ones.
Myth three: you cannot wash starter microlocs for weeks. You can wash gently and much sooner than legend says. What matters is technique, not abstinence — gentle handling and full drying protect the pattern far better than avoiding water. When in doubt, ask your loctician for your head’s timing, not the internet’s.
Questions to Ask Before Install Day 12
Walk into the appointment with answers, not just excitement. Can you keep the retightening rhythm this method needs for a full year? Does the grid suit how you actually wear your hair every day? Is your hair healthy enough for hundreds of sections right now? If any answer is no, waiting a month beats fixing a year.
And one question for the loctician that reveals everything: show me a head you installed and have maintained for over a year. Day-one photos show skill with a camera. A head maintained for a year shows skill with hair. If you are still choosing between loc types overall, our Types of Locs guide compares the maintenance each type asks for.
- Grid approved on photos — front, sides, back, and crown — before any method work starts.
- Method chosen for my texture and lifestyle, not copied from a video.
- First retightening booked before leaving the install chair.
- Tension plan agreed — what to report, and how fast it gets fixed.
- Aftercare handoff clear — first wash timing, night protection, and root separation.
Your 14-Day Start Action Plan 13
Starting microlocs is a sequence, not a single appointment. Run these steps in order and the common beginner mistakes mostly disappear on their own.
- Days 1–2: Check hair health. Look honestly at breakage, dryness, and scalp condition. If the hair is fragile, spend a few weeks on gentle care first. A delayed install beats a damaged one.
- Day 3: Book the consultation. Bring install photos you like and one you dislike, your daily routine, and your real calendar. Ask the four questions from the preparation section.
- Days 4–5: Choose the method. Decide with the loctician using the comparison table, not a trend. Confirm whether extensions are in or out before grid planning starts.
- Day 6: Prep for install day. Buy a satin bonnet or scarf if you do not own one. Pack water, a snack, and something to listen to. Plan a clarifying wash for the day before.
- Day 7: Install day. Photo-test the full grid before method work begins. Tension-check every section as it is done. Speak up the moment anything hurts.
- Days 8–10: Hands off. Night protection from the first night. No restyling, no tight hats. First gentle root-separation pass along the parts.
- Days 11–14: First wash and the booking. Wash gently at your loctician’s timing and dry fully. Confirm the first retightening is on the calendar.
After day 14, you are maintaining, not starting. The checklist in the previous section keeps the maintenance honest, and the care hub carries the routine from here.
Starting Microlocs: Questions, Answered 14
How long does a microloc install take?
Plan a full day. The time varies widely with hair density, length, the chosen method, and the loctician’s speed, and with hundreds of sections there is no quick version. Interlocking usually takes the longest, twists the shortest. Ask your loctician for their estimate at the consultation, then add a buffer.
Can I start microlocs at home by myself?
You can, but read the trade-off section first. The method work is learnable; the parting is where home installs most often fail, because hundreds of even sections on the back of your own head is genuinely hard. The middle path — professional grid, DIY maintenance — works well for many people.
How soon can I wash after the install?
Follow your loctician’s timing for your head and method. Many people wash gently within the first couple of weeks without trouble. Technique matters more than waiting: gentle handling, minimal manipulation, and complete drying protect the set far better than avoiding water.
Do I need extensions to start microlocs?
No. Most microlocs start with your own hair only. Extensions add instant length but also weight, which changes how the locs feel, sleep, and retighten. If you want them, decide before the grid is drawn, because added hair changes section planning from the first row.
How do I know if my grid is good?
Run the photo test: full grid finished, photographed from front, sides, back, and top. Good looks like even sections within each zone, a deliberate hairline, and rows you would be happy to see in every retightening photo for the next two years. If a row bothers you in the photo, fix it before method work starts.
What is the difference between a microlocs install and a Sisterlocks install?
Microlocs are a flexible category: several methods, flexible sizing, any experienced loctician. Sisterlocks are a trademarked system installed by certified consultants with a specific tool and grid pattern. Our Microlocs vs Sisterlocks comparison covers the full difference, and our Sisterlocks guide explains that system on its own.
How much does a microloc install cost?
It varies widely by region, hair density, length, method, and loctician experience, so any single number you see online is someone else’s situation. Get two or three quotes from locticians whose maintained work you have seen, and ask what the first retightening costs too, since that is part of the real first-year price.
When is the first retightening?
Commonly around 4 to 8 weeks after install, though ranges vary with growth rate, texture, and method. Your loctician sets the date. The practical rule from this guide: book it before you leave the install appointment, and keep it even if everything looks fine.
Bottom Line 15
A microloc install is three jobs: an approved map, a method that fits your hair, and a booked next appointment. Do those three and the first 90 days largely run themselves. Skip one and you will feel it for a year, usually at the roots.
Use the Micro Locs guide for the big decision, this guide for the install, and our dreadlock care hub for the routine. Dreadlocks reward the patient and punish the rushed, and nowhere is that truer than at the start. Book the consultation this week. The locs you want in two years begin with the grid you approve this month.
This article is for general informational purposes only. Individual results, hair types, scalp conditions, and situations may vary. For personal hair or scalp concerns, consult a qualified loctician or dermatologist.
